
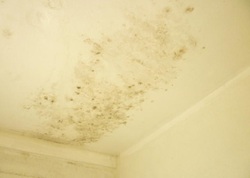
In my experience, mold and mildew stains in bathrooms seem to be caused by two factors. One is the lack of adequate ventilation which causes moisture to build up which then condensates and creates an environment for mold and mildew to propagate. Having adequate ventilation allows moisture to be expelled and diminishes the opportunity for mold or mildew to grow.
The other factor is the paint. A lot of people don't pay attention to the paint that they are using, I mean, paint is paint, right? Well, not exactly. Semi-gloss and high gloss paints have anti mold/mildew properties. That glossy sheen creates a barrier that inhibits mold growth and thus this type of paint should always be used in moisture rich places like bathrooms and kitchens and maybe even laundry rooms.
Removal is fairly easy. You will need to roll up your sleeves, put on a pair of rubber gloves and get to it. With a mixture of bleach and water or better yet, a good stain remover from your local hardware store, you apply the affected areas and let it do its magic. After several minutes grab your brush and start brushing. Once the mold/mildew is removed to your satisfaction dry any excess moisture and let dry. Use a portable fan if possible to speed up the process.
Once the walls are dry, apply a couple of coats of stain blocking primer. Make sure you tape up any trim or fixture you don't want painted with masking tape. Once the primer has dried, you can proceed to applying two coats of semigloss in your desired color. Make sure you follow the paint manufacturers directions to insure a long mold free bathroom experience.

 RSS Feed