
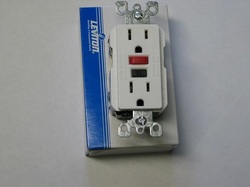
In the US, more than 300 people get electrocuted in their homes every year! This is the reason Ground Force Circuit Interrupt or GFCI outlets are becoming more and more prevalent in today's homes.
It used to be that municipalities required installation of GFCI outlets in moisture prone areas like kitchens and bathrooms, though now they are being considered as a requirement throughout the home for obvious reasons.
invented in 1961 by Charles Dalziel, a Professor of Electrical Engineering at UC Berkeley, Its operation is fairly simple. It basically monitors the flow of electricity into and out of a given appliance. If the difference exceeds 5 milliamps, it basically tells itself that a ground fault may be occurring. The GFCI outlets cuts power in as little as .025 seconds.
We can all see the benefits of the GFCI. It is a little expensive when compared to its more basic brother, but when you weigh in the potential damage it can prevent or even save a loved one's life, it's actually pretty cheap. Primarily preventing shock, fire and damage to appliances.
Installation is the same as the non-GFCI outlets. Remember to turn off power the area you are working on to avoid any problems. Again, if you are not comfortable with electricity, then leave it to the pros. otherwise, if you are handy, it should take too much brain power to install it.
 RSS Feed