
Ceiling fan installation is one of those necessities of summer. Although ceiling fans do not change the temperature in the room, the circulation air gives your body the feeling of the temperature in the room being several degrees cooler. And that is pretty much the whole point. Feeling cooler in the hot weather, right?
If you have basic tools at your disposal you can probably install a ceiling fan yourself. But, Don't blame me if you mess up! If you're willing to do the job, we are assuming you are competent enough to do the job, right? Otherwise take this for educational purposes and get yourself a competent ceiling fan installer.
First things first. We are assuming there is a powered junction box at the center of the room where the fan will go. We are also assuming the junction box is installed properly and is rated to carry the weight of the ceiling fan. If none of these are in place, STOP! Call a licensed electrician to take a look at your set up. Once proper wiring is complete we can continue.
Assuming everything is properly installed, there will be a light fixture of some kind or even an older ceiling fan. Before you you start, turn the power off to that room by looking in your homes electric panel which will be outside of the house or even inside a closet if you live in a condo apartment. It should be labeled. Otherwise you can shut power off to the whole house.
Start by removing the fixture and and attachments. generally there are 2 screws holding the fixture to the junction box. Disconnect the wiring from the fixture and set aside. Your new ceiling fan will most likely come in a box and will have to be assembled. There will be a bracket that attaches to the junction box by the same two screw or may be provided with your fan. Attach bracket to junction box and run wires through the provided opening. Make sure it's a snug fit but don't over tighten. Every ceiling fan design is different so different steps will be needed with differing designs. For this post we will use a design similar to the picture in this article. Assemble the fan per manufacturers instructions. Take fan body and let it sit in the bracket opening while you wire it. use decorative accessories to hide wiring. Install fan bladed, lights ( if applicable) and you're done. If you followed manufacturers instructions and wired properly it should work now. Good job!
If you have basic tools at your disposal you can probably install a ceiling fan yourself. But, Don't blame me if you mess up! If you're willing to do the job, we are assuming you are competent enough to do the job, right? Otherwise take this for educational purposes and get yourself a competent ceiling fan installer.
First things first. We are assuming there is a powered junction box at the center of the room where the fan will go. We are also assuming the junction box is installed properly and is rated to carry the weight of the ceiling fan. If none of these are in place, STOP! Call a licensed electrician to take a look at your set up. Once proper wiring is complete we can continue.
Assuming everything is properly installed, there will be a light fixture of some kind or even an older ceiling fan. Before you you start, turn the power off to that room by looking in your homes electric panel which will be outside of the house or even inside a closet if you live in a condo apartment. It should be labeled. Otherwise you can shut power off to the whole house.
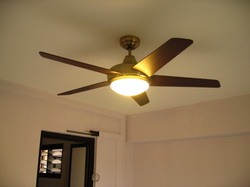
Start by removing the fixture and and attachments. generally there are 2 screws holding the fixture to the junction box. Disconnect the wiring from the fixture and set aside. Your new ceiling fan will most likely come in a box and will have to be assembled. There will be a bracket that attaches to the junction box by the same two screw or may be provided with your fan. Attach bracket to junction box and run wires through the provided opening. Make sure it's a snug fit but don't over tighten. Every ceiling fan design is different so different steps will be needed with differing designs. For this post we will use a design similar to the picture in this article. Assemble the fan per manufacturers instructions. Take fan body and let it sit in the bracket opening while you wire it. use decorative accessories to hide wiring. Install fan bladed, lights ( if applicable) and you're done. If you followed manufacturers instructions and wired properly it should work now. Good job!
 RSS Feed